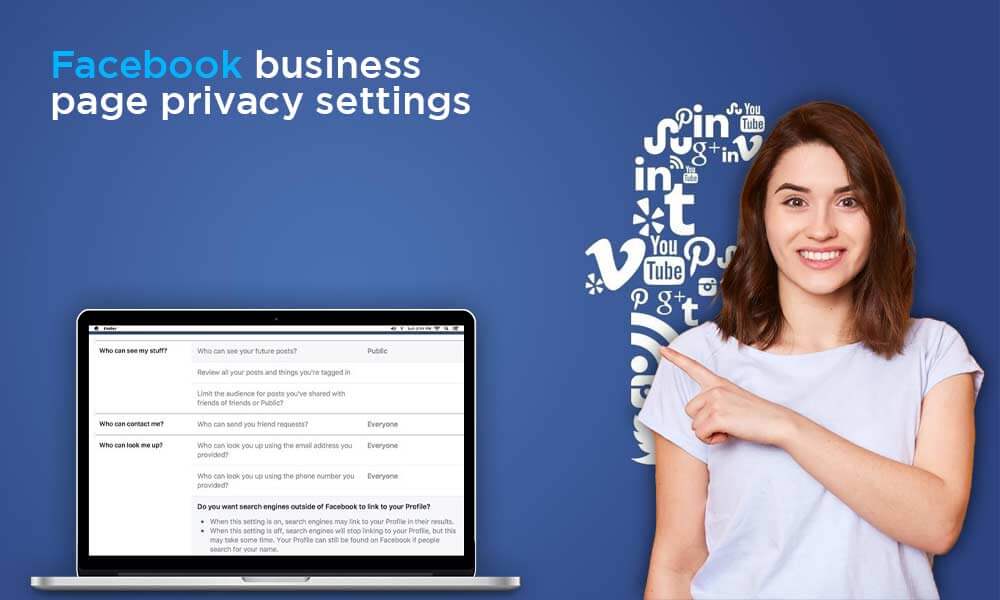
Facebook Business Page Privacy Settings: What You Need To Know
A Facebook business page is an excellent approach to enhance your leads and grow your business online. It is quite easy to create a new business page with Facebook, but the tough part begins after that, mainly when you need to manage the privacy settings. There are too many options of Privacy settings are available, and hence beginners often feel it overwhelming. So, here we are discussing the most important privacy settings for your Facebook business page and the ways to toggle them.
First, make sure you are logged in to your Facebook profile with which your business page is associated and then do the following things:
Prep-up:
After creating a Facebook business page, it will appear on the left side of your Facebook homepage under the “Pages” category. Click on the name of your page. Now, click on:
“Edit page” from the top-right corner and then select “Edit Settings” from the drop-down menu.
Manage Settings:
Now, the Settings for your page will open and then move towards all the features available on the page. There is a privacy option for each setting, so set your choices accordingly and make the required restrictions. There are plenty of settings options that you can play with:
Manage Page Visibility
You can now manage the page visibility with few clicks of the mouse. This has nothing to do with the privacy settings of your Facebook profile. Even if your profile is public you can keep your page private. When you click on the “Edit” button, next to the “Page-visibility”, you will get two options namely “Page Published” and “Page unpublished”.
“Page unpublished” keeps your page private to you and other admins only, on the other hand, if you select “Page Published”, your page will be visible to every member of the Facebook community. The “Page unpublished” should only be selected when you are planning to discontinue your page for a temporary time period or you want no one to see your page until it reaches the desired extent in regards to design and customization. However, the “unpublish” option is a serious matter hence it is should be avoided.
Manage Posting Ability and Visibility
Using this option, you can select the people who can post on the timeline of your FB page. If you don’t want anyone to post on your timeline. So, uncheck the option “Everyone can post to [your business page’s name]’s timeline.” Also, you can uncheck the “Everyone can add photos and videos to your business page’s name]’s timeline.” option in the “Vistors Post” menu
Businesses usually do not accept random posts from unknown people as it can affect the quality of your page. Therefore, maintain the posting restrictions on your FB pages so that only you and other authorized members can post.
But, if your page is an open community and you invite the latest updates from others, you can allow them to post on your timeline. Also, you can select “Highlight recent posts by others in a box at the top of my Page timeline” so that the latest posts remain on the top. When you allow posting from others, you may get the news and posts that you could have never found.
What You Should Restrict
After establishing a page, you need to focus on the required restrictions. There are ways to control who can send you messages, or view your page. Moreover, you can set certain “Country Restrictions” and “Age Restrictions.”, if required for the betterment of your page. Being selective about countries is useful when you are receiving a lot of spam from a particular country or your products or services do not cater to specific countries. Likewise, if your page is involved in services restricted to certain “age groups”, restricting the other age groups will be a wise decision.
Moderating Your Page:
There is a “Page moderation” option that makes it possible for you to manage and determine the “keywords and phrases” for the comments or posts. For instance, if you are receiving harassing or inappropriate comments, select the “keyword” that is frequently used, FB will block those comments automatically. You can also set the “Profanity filter” to avoid the adult or strong language.
Allow “Comment Replies” on Your Page
Doing this will make your users interact with each other, and increases comments on your posts. So, always allows comments replies for your FB page.
You can change your privacy settings whenever you want. But to grab the maximum attention, it is advisable to keep your FB page, an open-platform. However, if you think spam or malicious threats are eyeing on your business, keeping the strict rules would be great.
To enable the comments:
Go to the Page settings>> Notifications>>New post comment>> Turn on
Allow Search Engines to Show Your Profile
This new feature is available after the 2018 update release. If you allow the “search engine outside of Facebook to link your profile”, the users who are not active or logged-in on Facebook can also open your Facebook page. But if you don’t want the outside users (other than the FB users) to view your page, you can uncheck this section.
Verdict
This was all about setting your Facebook page privacy. However, there are numerous privacy settings available; we have only discussed the important ones. You can play along and find what other changes would work for you.

Senior Writer, Editor, and Copywriter with a total of 7 years of experience in the niche of emails, troubleshooting, and social media. She writes and manages a team of 10 senior writers.


