How to Download a Photo on Mac?: A Complete Guide
The Apple ecosystem makes it stand out from competitors. If you own several of their products, they are easy to connect, allowing you to share data across different devices. You can easily download your iPad photos to your Mac, for example.
Even though you can’t download YouTube videos on your device without using any external application. When it comes to downloading photos and videos from Facebook Messenger, everyone finds it easy. But what about the other platforms or search engines? It might lead you to ask: how do you download images on your Mac from other sources?
Our Mac photo download guide is here to help. Believe us, it’s definitely the easiest thing to do. Keep reading and learn how to download a photo on a Mac from the internet, iCloud, and other devices.
Download a Photo from the Internet
Learning how to download a photo on a Mac from the internet is simple. In most cases, you need only right-click on the picture and choose Save Image. After that, you can rename the file and select a save location.
Drag and Drop
An easier way to download a photo on Mac is to drag and drop it to the desired folder from any source. You can also drop it onto an open app, like Word. The drawback is you cannot rename the file.
Print Screen
You cannot save an image directly from some places on the internet, such as Instagram. However, you can capture your screen with Command + Shift + 3. The screenshot will go to your specified folder.
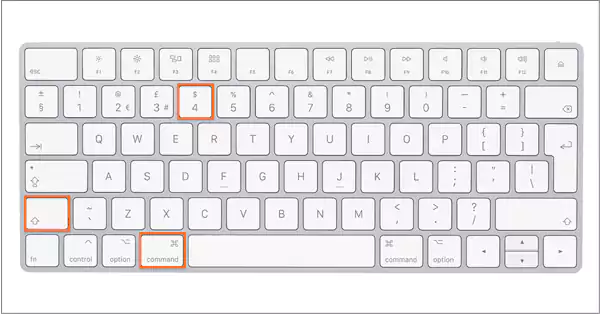
Use Command + Shift + 4 to capture a specific section of your screen instead. Left-click on your mouse and drag across the area you want to capture.
Mac Photo Download From iCloud
iCloud is a secure place to store your photos, but what if you want to access them offline? It’s often when we want to cherish our memories or look for something important, but we don’t have You can do it in two ways.
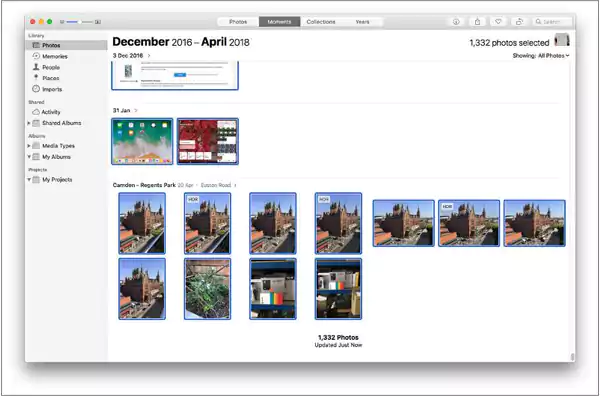
- First, go to the iCloud website and sign in with your Apple credentials.
- Click on Photos, navigate toward the album you want, and select your desired photos for download. To pick everything, press Command + A on your keyboard.
- Look for the download button in the top right corner. It is an icon of a cloud with an arrow going downward.
- If you select multiple photos, they save as a folder. They automatically go into your Downloads folder.
Download All Photos and Videos on Your MAC From Google Photos
If you’re looking for an option to download all your photos from Google Photos on a Mac in one go, you’re out of luck. Google Photos doesn’t allow you to do this. But, there’s still a way around to help you with this issue.
You can choose every photo manually one by one. But if you want to transfer many or all photos to your Mac, this method won’t work.
To get a complete backup of your Google Photos in the quickest way, you’ll need to use the Google Takeout tool. Yes, you heard it right, this is the same tool you use to export all types of user data from your Google account. You can export your notes, mail messages, Chrome history, and more.
So let’s get started with this without any further delay!
- Download Google Takeout and log in to your account.

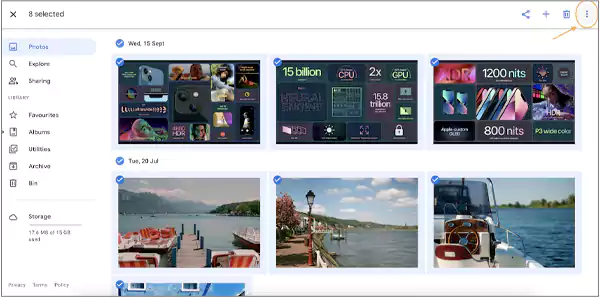
- After logging in, select the data you want to include. Make sure to select Google Photos, because we are here to get the images in your MAC. You can also first choose “Deselect all” and tick Google Photos if you only want to download your images and videos.
- Select the albums you want to download. If you click on the “all photo albums included” button, you’ll get a pop-up that lets you pick and decide which albums you have in your library, as well as albums of a specific year.
- When you’re done, click “OK” and then choose the “Next Step”
- Select the way to export your files from the range of export options on your screen. You can decide the folder in which you want to download as well as opt to transfer everything to another cloud provider such as OneDrive.
- Select the maximum limit of file size to make it easier to download, but that’s totally optional.
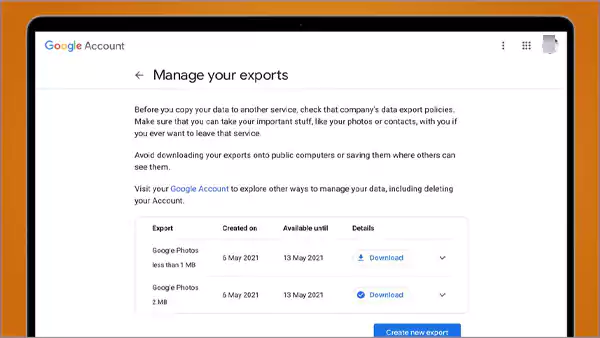
- Click “Create export”. You will get the download link sent to your email once you confirm everything.
- Check your email for the download link and start the process.
After completing all the above steps, you’ll be able to successfully transfer all your media from Google Photos to your MAC. Remember that Takeout doesn’t let you watch the previews of the content you’re exporting. Thus, you need to cross-check with Google Photos on another tab before selecting the albums.
Downloading a Photo on Mac from an External Device
Connect the device to your Mac with its USB cable. Open the Photos app, look for Devices in the sidebar, and click on your device.
At the top of the screen, select the Import option. Click the dropdown menu to reveal your options. You can save to the following locations:
- Photos library
- Another album
- New album
After setting the destination, choose the photos you want to download. You can select “Import all new photos” or “Import a selection of photos.” For the latter, select the specific files.
Wait for the import to finish before disconnecting the device. You now have access to the photos, which you can sort out and edit as desired.
You can also use online sites and applications that allow you to seamlessly transfer your data from one device to another over the internet.
Learn How to Download a Photo on Mac Now
Learning how to download a photo on a Mac from any source becomes more convenient with the tips above. However, be careful of downloads from the internet and other sources. You do not want malware and other unwanted programs to find their way to your Mac.


